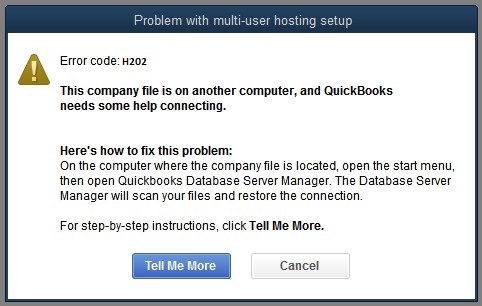
QuickBooks Error H202 is a common H series error that occurs when a user tries to access a company file in multi-user mode. This issue is also known as a multi-user switching issue.
QuickBooks Error code H202 emerges with a pop-up display message as

Why does QuickBooks Error H202 Arises?
Before we directly jump on to the solutions for resolving the error, you need to understand why this error arises. So that you can prevent this occur from occurring again in the future.
Here are the possible reasons why the QuickBooks error H202 occurs.
- Compatibility and network issues of the QuickBooks database server manager.
- Incorrect hosting settings.
- Incorrect or wrong DNS settings.
- Background active firewall software is disabling the QuickBooks to connect with the server.
- QuickBooks network data file (.ND) file is damaged or corrupted.
- When the QuickBooksDBXX and QBCFMonitor are missing from the system, it can lead to the QuickBooks error code H202.
Symptoms of QuickBooks Error H202
Let’s look at the symptoms through which you can easily identify the QuickBooks error code H202.
- Unable to use the QuickBooks in multi-user mode.
- Your PC is constantly hanging.
- Facing problems in accessing the company’s file in a different workstation.
- Unable to run the QuickBooks desktop application.
- A pop-up window on your screen displays the QuickBooks error code H202.
How to Resolve QuickBooks Error Code H202?
Let’s look at the tried and tested solutions you can follow to resolve the QuickBooks error code H202.
Solution 1. Fix QuickBooks Network Issues
Below are the steps you can follow to repair the QuickBooks network issues.
- First, you must download the latest QuickBooks tool hub (1.5.0.0) on your PC.
- As the downloading ends, open the downloaded file and follow the on-screen instructions to install the tool on your PC.
- Thereon, launch the QuickBooks tool hub on your PC.
- Moving ahead, click on the “Network Issues” option available on the left side of the screen.
- Next, click on the “QuickBooks Database Server Manager” (QBDBMGrN) option.
- Moving ahead, select the “Start Scan” option and select your company’s file by clicking on the “Browse” option.
- Followed by the above steps, click on the “Start Scan” option again.
- Now, the scanning process will commence on your screen.
- At last, click on the “Close” option to exit the tool.
After performing the above steps, verify if you can access the QuickBooks company’s file. If you cannot access the file, then try the next solution.
Solution 2. Change the Window’s Firewall Settings
If the QuickBooks error H202 is arising due to the firewall settings, then, in that case, rectifying the window’s firewall settings can be a solution for getting the error resolved.
Below are the steps you can follow to rectify the PC’s firewall settings.
- First, you have to create exceptions for QuickBooks in the system firewall settings so it can run smoothly.
- After that, make the necessary changes to the system’s firewall settings and install the QuickBooks desktop application on all workstations.
- Now, open QuickBooks and click on the “File” menu option available at the top of the screen.
- At last, click on the “Switch to Multi-User Mode” under the menu drop-down list.
If you still face issues while switching to the multi-user mode in QuickBooks, don’t panic and move to the next solution.
Solution 3. Verify the QuickBooks Services on Hosting Workstation
Below are the steps you can follow to ensure that the QuickBooks services are working properly in the hosting workstation.
- First, open the windows run command, type “services.msc” in the insert field, and then click on the “OK” option.
- Under the list of services, check there for the “QuickBooksDBXX” option (XX stands for the QuickBooks version year).
- Then, you must ensure to select the startup type as “Automatic” for this option.
- Afterward, select “Running” or “Started” mode in the service status option.
- Moving ahead, tap on the recovery button option and select the “Restart the Service” option for the first, second, and subsequent failure options.
- Here, ensure to save the updated changes by clicking on the “Apply”> “OK” option.
- Thereon, perform the same steps again for “QBCFMonitorService.”
- After performing the above steps, then examine if you can access the file in multi-user mode or not.
After trying all the solutions mentioned above, the QuickBooks error code H202 will be resolved at this stage.
Ending Note
We hope this blog helped you in getting the error resolved. In this post, we have covered all the information on how to resolve QuickBooks error H202. Above, we have provided three solutions you can follow to resolve the error. If even after following the solutions, you still face any problems, you can reach out to us through the chat box.
Connect with our QuickBooks experts through mail at info@rapidresolved.com. Our experienced and professional QuickBooks experts are available 24/7 at the help desk to attend to your query.


